There is a group of us who like to do various crafts. This is a place where we can share our upcoming, current and completed crafts with each other. We invite others to take a look at what we're working on, too!
Tuesday, April 19, 2011
Diaper Cover
I started the diaper cover on Sunday and finished it today. It really did work up very quickly. I'll have to use either safety pins or a Snappi to hold it closed. (I'll put either a prefold or a fitted under this.)
Saturday, April 16, 2011
Baby girl hat
As many of you have seen on my blog, I posted the completed project that I've been working on - a sleep sack and hat for "Arlo." I also snuck in a little time to make a hat for a friend who had a baby girl a couple of weeks ago. I mailed it on Friday so hopefully she gets it in the mail before she looks at this blog (if she'll even look here, being busy with a new baby and all!).
Friday, April 15, 2011
knockoff....
i found this blog yesterday and instantly fell in LOVE with it....... http://knockoffdecor.com/
it's basically A LOT of DIY tutorials to make stuff that resembles things from Pottery Barn, William-Sonoma, Anthropologie, Crate & Barrell, Pier 1, etc.......it's the BEST thing ever!!
I think I'm gonna make this http://knockoffdecor.com/moss-monogram/ over the weekend to hang on my front door for the Spring ......super easy, super cute and super cheep.....Pottery Barn sells them for $79 bucks......
it's basically A LOT of DIY tutorials to make stuff that resembles things from Pottery Barn, William-Sonoma, Anthropologie, Crate & Barrell, Pier 1, etc.......it's the BEST thing ever!!
I think I'm gonna make this http://knockoffdecor.com/moss-monogram/ over the weekend to hang on my front door for the Spring ......super easy, super cute and super cheep.....Pottery Barn sells them for $79 bucks......
Thursday, March 17, 2011
Can you help me?
You've heard (read) about the sleep sack I'm making for this (still nameless) baby. I've gotten to a point where I don't feel comfortable going further for fear that I might have to rip out more than I might already have to .....
So when I first read the pattern, I felt quite confused about what it meant by where to mark for the sleeves. I finally felt comfortable enough to continue on, and marked at row 13 as stated. I then saw that the "bodice" was crocheted from the waist up, not the neck down, so I thought maybe that was why I was confused. But now that I'm working on the sleeves, it seems so wrong! My sleeves look way too big. But when I look at the photo posted with the pattern, it does look like it is 13 rows from the waist. My bodice has 38 total rows as stated in the pattern. So think you can take a look at my pics and the patterns pics and tell me where I'm going wrong?? Thanks!
(Also, when I work the math, it checks out - 38 rows in the bodice, minus the 13 rows that were not intended to have sleeves, = 25. As I was crocheting the sleeves, I came up with 50 all the way across - 25 for the front bodice, 25 for back. So if I'm doing everything like the pattern says, and the math works out, WHY do the sleeves look so big??)
Here is the pattern.
Here is my sleep sack so far:
Also - I looked at the pattern again and saw that my sleeves, at their widest point, should measure 7.5 in. across, and mine measure 11in!! So how can my math work out but the inches are so wrong?
WAHHH!! I need help!!
So when I first read the pattern, I felt quite confused about what it meant by where to mark for the sleeves. I finally felt comfortable enough to continue on, and marked at row 13 as stated. I then saw that the "bodice" was crocheted from the waist up, not the neck down, so I thought maybe that was why I was confused. But now that I'm working on the sleeves, it seems so wrong! My sleeves look way too big. But when I look at the photo posted with the pattern, it does look like it is 13 rows from the waist. My bodice has 38 total rows as stated in the pattern. So think you can take a look at my pics and the patterns pics and tell me where I'm going wrong?? Thanks!
(Also, when I work the math, it checks out - 38 rows in the bodice, minus the 13 rows that were not intended to have sleeves, = 25. As I was crocheting the sleeves, I came up with 50 all the way across - 25 for the front bodice, 25 for back. So if I'm doing everything like the pattern says, and the math works out, WHY do the sleeves look so big??)
Here is the pattern.
Here is my sleep sack so far:
Also - I looked at the pattern again and saw that my sleeves, at their widest point, should measure 7.5 in. across, and mine measure 11in!! So how can my math work out but the inches are so wrong?
WAHHH!! I need help!!
New Book and Website
Happy St. Patrick's Day!
Just wanted to tell you about a new book I have started reading. Casey bought it for me for Valentine's Day (don't let that fool you...the girls at Town Crier help him each holiday/birthday) and I finally started it this week.
The Pioneer Woman (Black Heels to Tractor Wheels, A Love Story) by Ree Drummond
It is fabulous and had me hooked the first 10 pages...I love the way she writes! It is going to be good and I am sucker for love stories!
She lives in OK with her hubby aka Marlboro Man and their 4 kiddos. She has a website... www.thepioneerwoman.com
I thought someone told me about her website, but I don't know who? She is on Facebook and today got a fab recipe post I can't wait to try!
Check it out and let me know what you think!
Just wanted to tell you about a new book I have started reading. Casey bought it for me for Valentine's Day (don't let that fool you...the girls at Town Crier help him each holiday/birthday) and I finally started it this week.
The Pioneer Woman (Black Heels to Tractor Wheels, A Love Story) by Ree Drummond
It is fabulous and had me hooked the first 10 pages...I love the way she writes! It is going to be good and I am sucker for love stories!
She lives in OK with her hubby aka Marlboro Man and their 4 kiddos. She has a website... www.thepioneerwoman.com
I thought someone told me about her website, but I don't know who? She is on Facebook and today got a fab recipe post I can't wait to try!
Check it out and let me know what you think!
Thursday, February 24, 2011
My first LOOM!
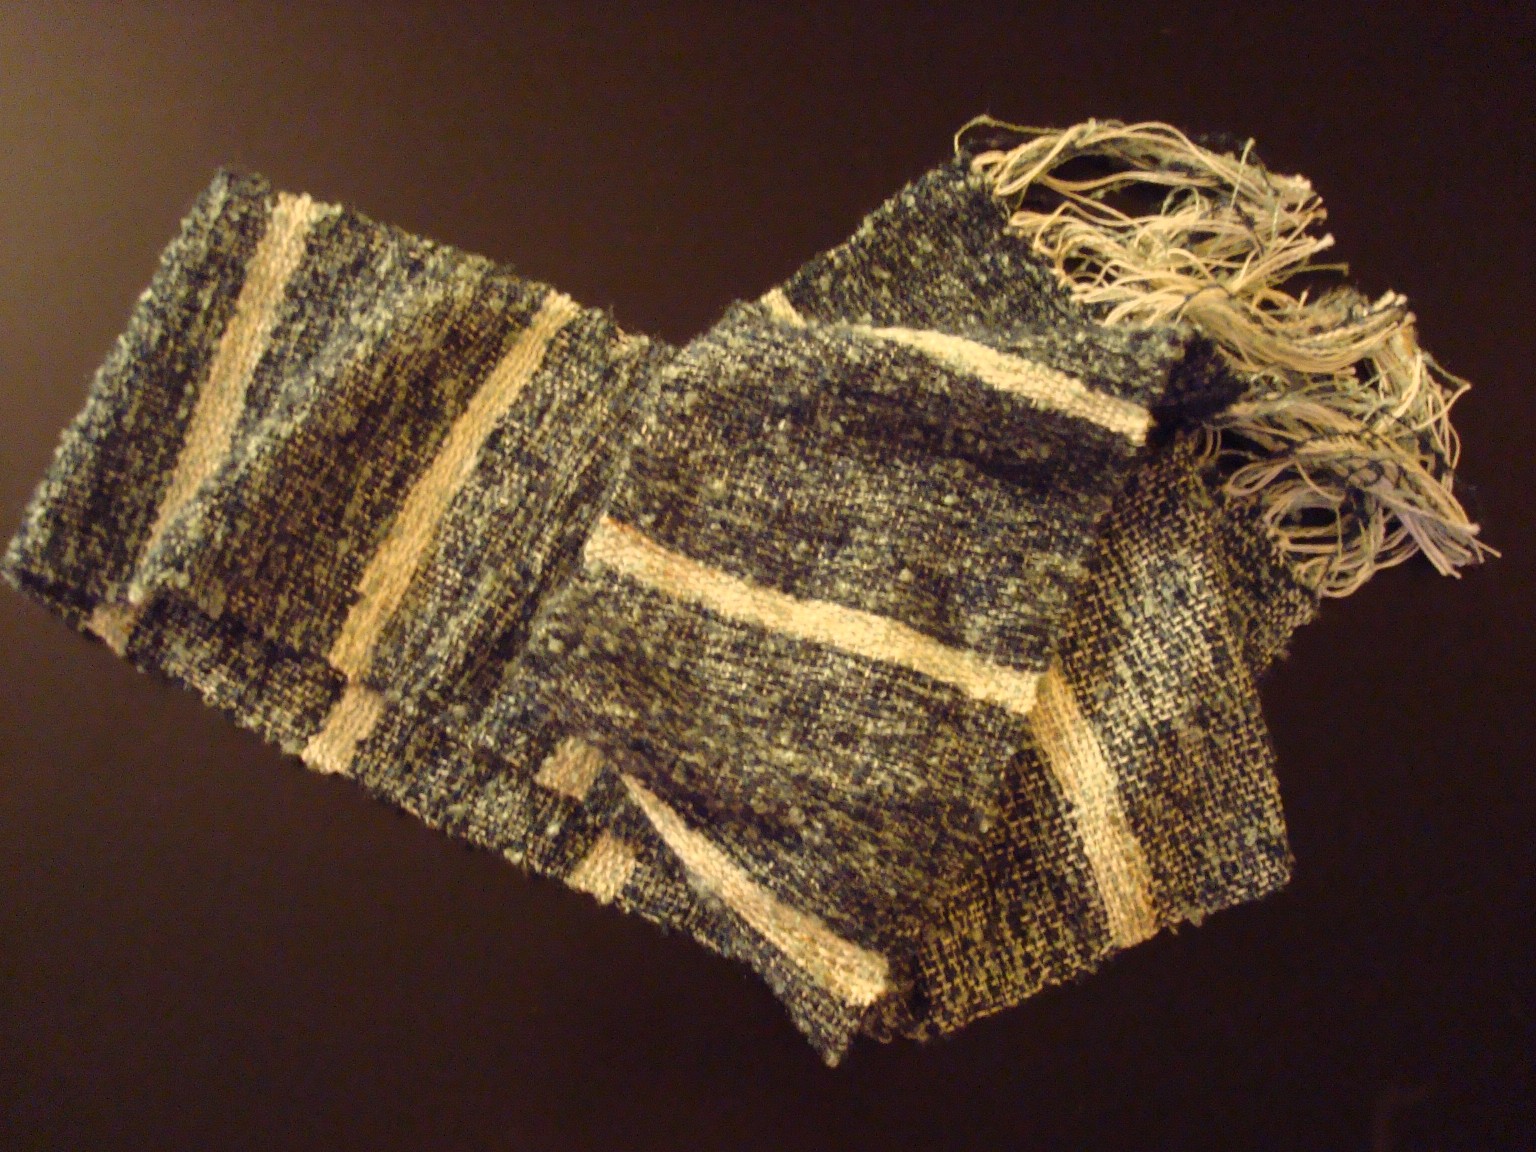
Several of my knitting friends are multi-talented...not only do they sew, knit, crochet but also spin and weave!! I have been fascinated with weaving the past year and Casey totally surprised me with a LOOM for Christmas...actually 2! A little one and a larger table top loom! My weaving friends gave me suggestions and helped me get started...I won't bore you with all the details....and TA DA....the first scarf on my LOOM!

I choose 3 colors and decided to make stripes!

It took some getting use to, but is so fun!
My dad is going to help with some minor adjustments and repairs. (Casey bought the loom from a local guy who makes them or refurbishes them...so it wasn't new, new.)

I am super excited to start weaving more crazy fibers and textures and make cool scarves! I can also do runners, place mats, small rugs, etc. BUT I LOVE SCARVES!!!
I choose 3 colors and decided to make stripes!
It took some getting use to, but is so fun!
My dad is going to help with some minor adjustments and repairs. (Casey bought the loom from a local guy who makes them or refurbishes them...so it wasn't new, new.)
I am super excited to start weaving more crazy fibers and textures and make cool scarves! I can also do runners, place mats, small rugs, etc. BUT I LOVE SCARVES!!!
Baby Blanket
Now that Idol is over for the night....I can blog!!!
My friend Andra had her second girl on January 25th...Vivana Clara Baldwin! She is adorable and already a month old weighing 10lbs! I wanted to make something for her and started in December (I think) on this fun blanket pattern.
The pattern was in 2 pastel colors and I wanted to do something fun and bright! Andra originally planned the nursery in polka dot brights so, I thought this was perfect. She did change the nursery colors, but oh well...baby will never know! I used multi-colored sock yarn and Caron simply soft solids to make the stripes.
It was fun and crocheted along pretty fast, but the more rows added...the longer it took to complete one round! It was crazy! Only 36 rows and an easy pattern to follow, but it would take me an hour or more to do those last several rows!!!
Thursday, January 27, 2011
So I went to create a Blog today and it asks my Blog name???? OH NO, I am stuck already. I need to think of a clever title. Hmmm.......I will have to come back to that later.
Any other Blog site favorites out there??
Saturday, January 22, 2011
Quilting Project
I have wanted to learn how to quilt for a long time. I am not really a "quilt" person in the traditional since. I have always wanted to make a T-shirt quilt, blue jean quilt or use scraps of fabric to make hodge podge quilts. Maybe even go back to my cross stitch days and make baby quilts!
Anyways, some of the ladies in my Tuesday Night Knitting group quilt also. There are 3 of us that wanted to learn so we got together in December and started a little quilting group. We decided to choose a pattern for one block. Each of us will work on our one block then pass it to the next person. They will add a border of some type and we will pass it again, and so on. When we are done, each of us will get our completed quilt back!
I am super excited and was a little nervous to start.
Last Sunday, we met and started on our blocks. I got a used sewing machine this summer (this is the first I have used it!), found a pattern, fabric and borrowed quilting supplies to get started.

Above is my work station and fabric!

Here is the pattern that I am editing with help to make it smaller. It is called Snowballs....I am using different colors and making a smaller block.

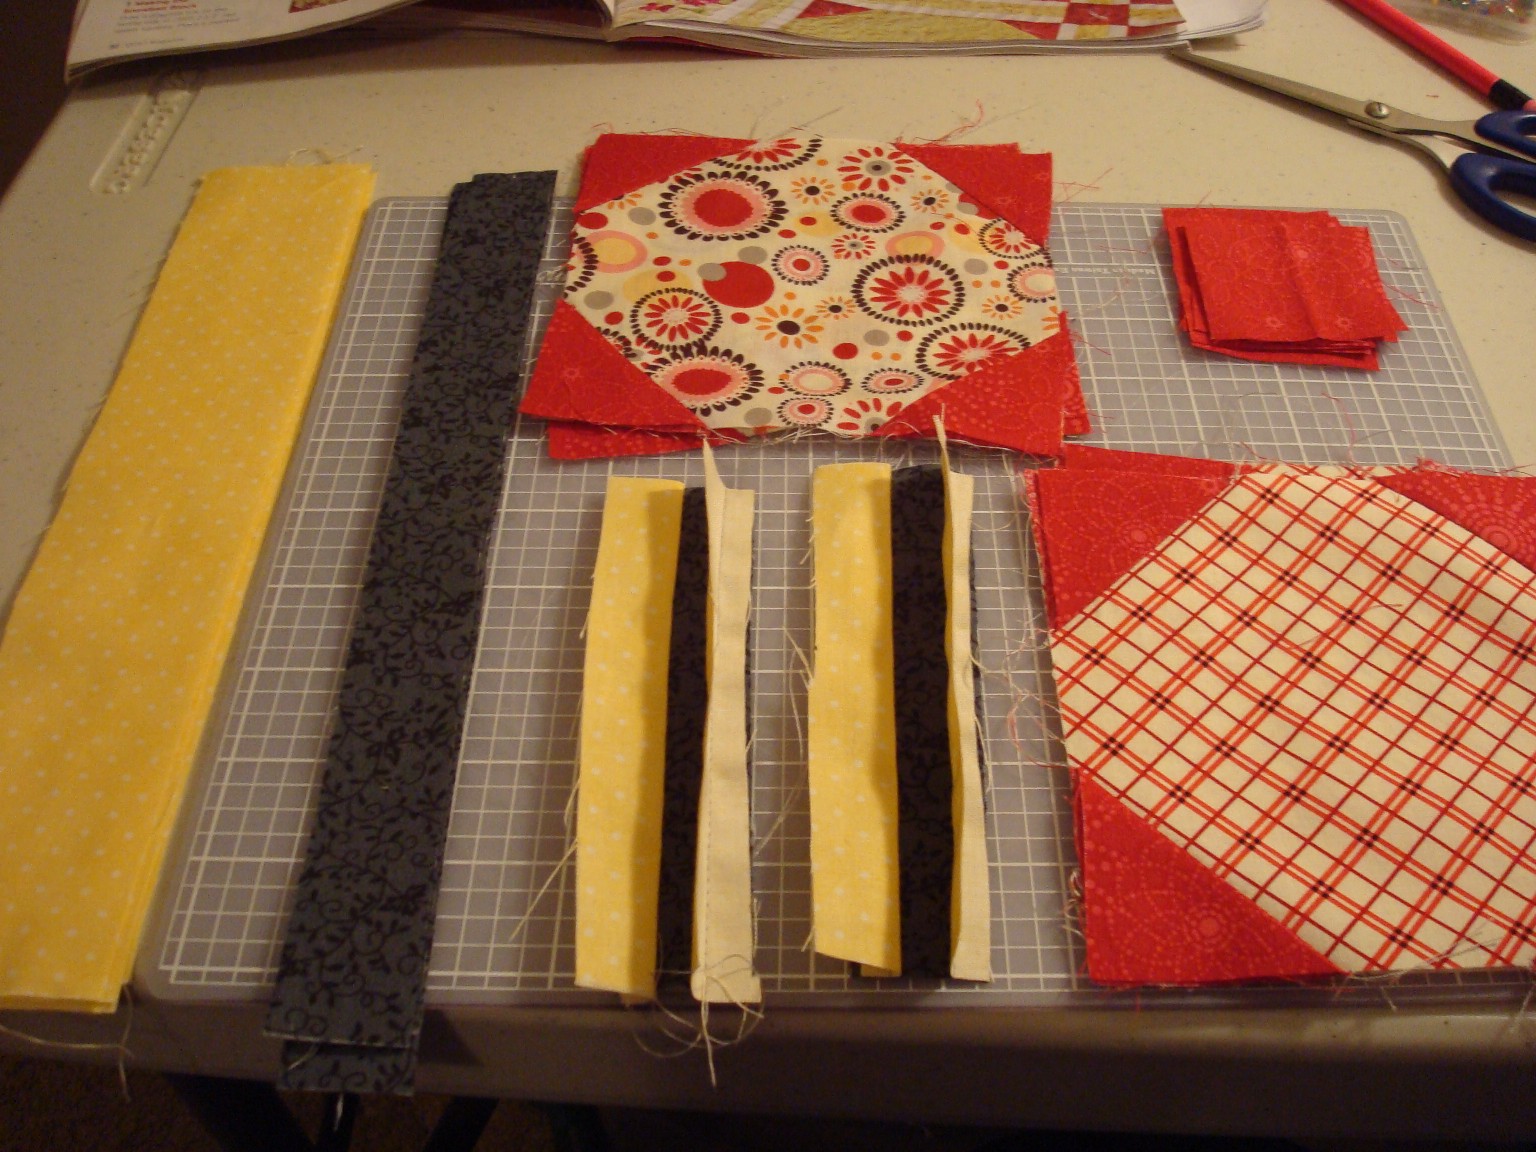
I found the swirly circle, red and black fat quarters at Joann's and realized I needed at least 2 more colors. So, I went to our local quilting store, Prairie Pieces, and picked out 2 more fat quarters..the check and yellow dot.

Today, I sat down and worked on my first part...the big squares with red triangles in the corners. Then I got adventurous and thought "why not just keep going"...so I did!!

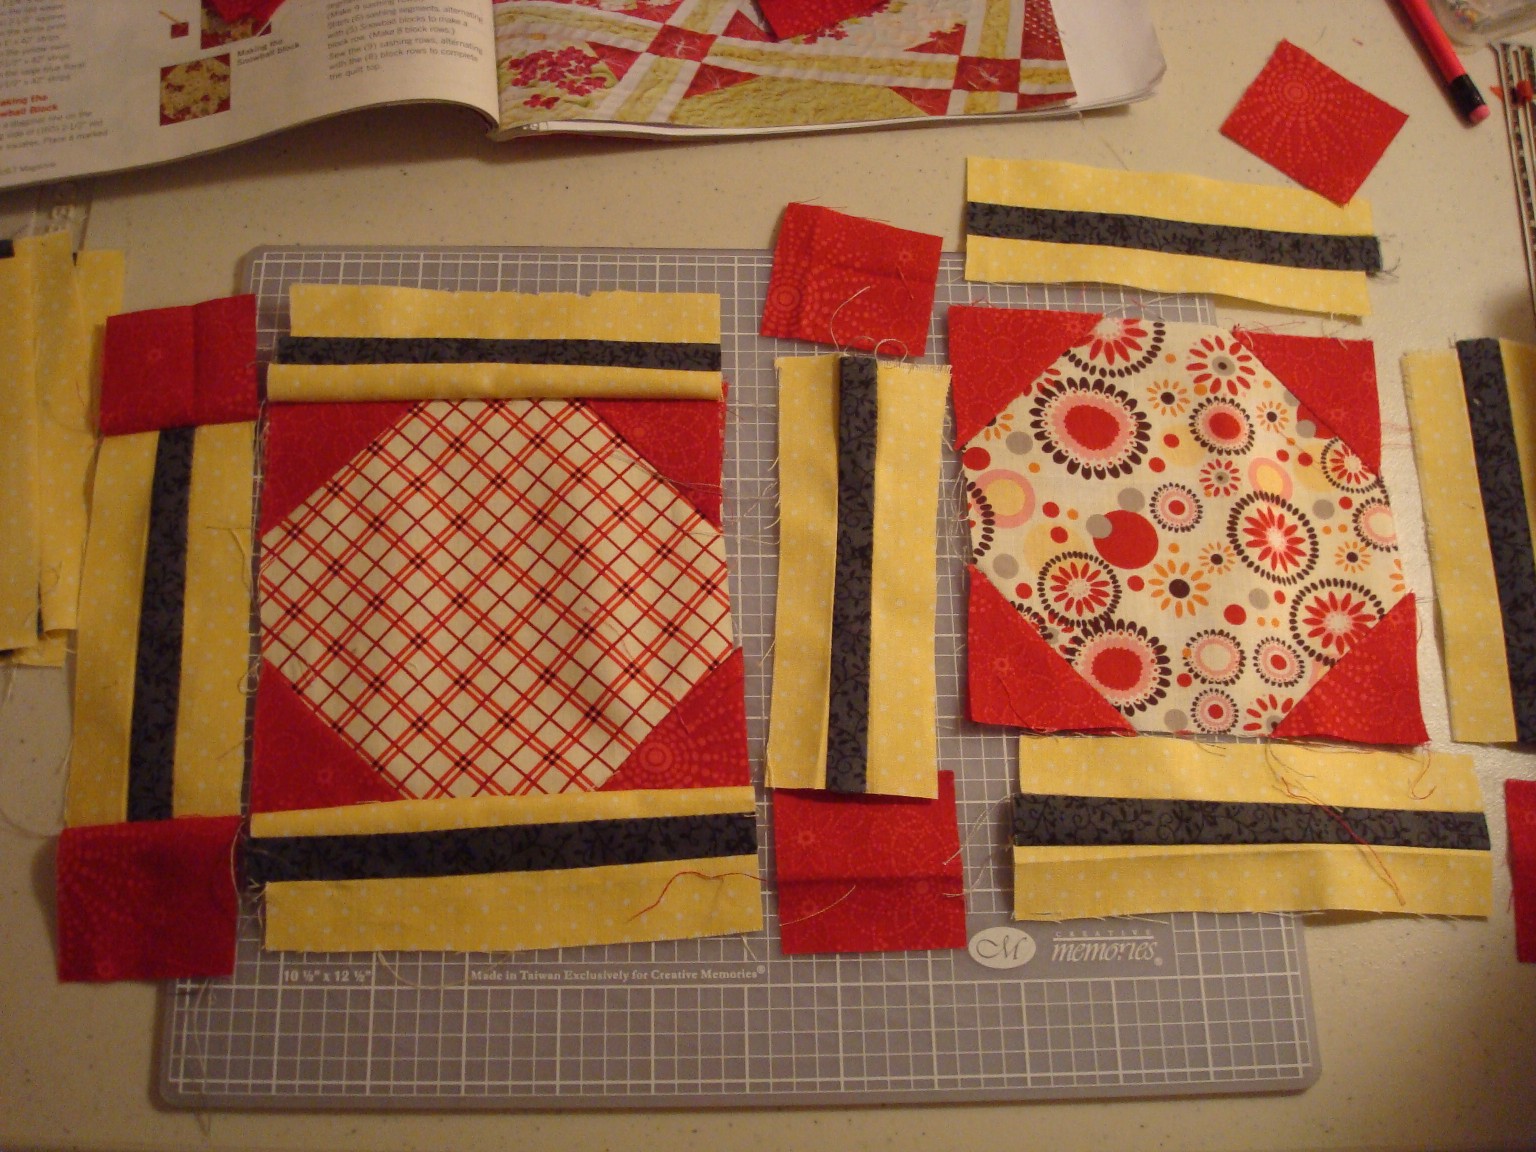
I measured out the side strips and corner squares then pieced it all together!

I am so excited and happy that I finished my first block!!! Mind you, I have no idea if I did it all correctly and some of it measures off, but I think it is cute!!
Now that I have got use to my sewing machine. I am so excited to try out other projects. I have pants that need to be hemmed and curtains that I want to shorten and change with my new living room furniture....but that is another blog!
Anyways, some of the ladies in my Tuesday Night Knitting group quilt also. There are 3 of us that wanted to learn so we got together in December and started a little quilting group. We decided to choose a pattern for one block. Each of us will work on our one block then pass it to the next person. They will add a border of some type and we will pass it again, and so on. When we are done, each of us will get our completed quilt back!
I am super excited and was a little nervous to start.
Last Sunday, we met and started on our blocks. I got a used sewing machine this summer (this is the first I have used it!), found a pattern, fabric and borrowed quilting supplies to get started.
Above is my work station and fabric!
Here is the pattern that I am editing with help to make it smaller. It is called Snowballs....I am using different colors and making a smaller block.
I found the swirly circle, red and black fat quarters at Joann's and realized I needed at least 2 more colors. So, I went to our local quilting store, Prairie Pieces, and picked out 2 more fat quarters..the check and yellow dot.
Today, I sat down and worked on my first part...the big squares with red triangles in the corners. Then I got adventurous and thought "why not just keep going"...so I did!!
I measured out the side strips and corner squares then pieced it all together!
I am so excited and happy that I finished my first block!!! Mind you, I have no idea if I did it all correctly and some of it measures off, but I think it is cute!!
Now that I have got use to my sewing machine. I am so excited to try out other projects. I have pants that need to be hemmed and curtains that I want to shorten and change with my new living room furniture....but that is another blog!
Baby Cakes Update
I got a BABYCAKE machine for Christmas and if you remember my previous post about this...I was super excited to try it out!!!!

It comes complete with the babycake machine (much like a waffle maker), cutters, frosting bag and tips, plus book with instructions and recipes!
All I had to add was the cake mix! This time I chose a strawberry cake mix with cream cheese frosting!

You mix the cake as directed and pour into the small 8 cups in the babycake machine. Close the lid, and bake til done!

I had fun decorating them and they are super cute and quite tasty! If I was taking them somewhere, I would have done a better job on the frosting.

I am looking forward to trying it out with other cake mixes, muffin mixes, brownies, etc!!
It comes complete with the babycake machine (much like a waffle maker), cutters, frosting bag and tips, plus book with instructions and recipes!
All I had to add was the cake mix! This time I chose a strawberry cake mix with cream cheese frosting!
You mix the cake as directed and pour into the small 8 cups in the babycake machine. Close the lid, and bake til done!
I had fun decorating them and they are super cute and quite tasty! If I was taking them somewhere, I would have done a better job on the frosting.
I am looking forward to trying it out with other cake mixes, muffin mixes, brownies, etc!!
Subscribe to:
Posts (Atom)